Introduction #
Auto-Rig Pro is a rigging add-on for Blender.
This article refers to it as ARP.
Official docs: ARP Official Docs | Smart Rigging
Jump to a section:
Model Cleanup / Body Rigging / Facial Rigging / Rig Layers
Workflow Overview #
Model Cleanup
├─ Character faces -Y axis
├─ Scale = 1
├─ Check normals
├─ Remove unnecessary meshes
└─ Apply Modifiers -->> Subdivision Surface and Solidify can be left unapplied

Auto-Rig Pro
Body Rigging
├─ Smart → Get Selected Objects (start with the body)
├─ Place marker points
├─ Adjust marker points → Generate reference bones ----->> ↓ iterate back and forth
├─ Match to Rig → Generate controllers -->> ↑ iterate back and forth
└─ Bind body

Facial Rigging
Model Cleanup #
To use ARP Smart rigging workflow,
The character must face the -Y axis.
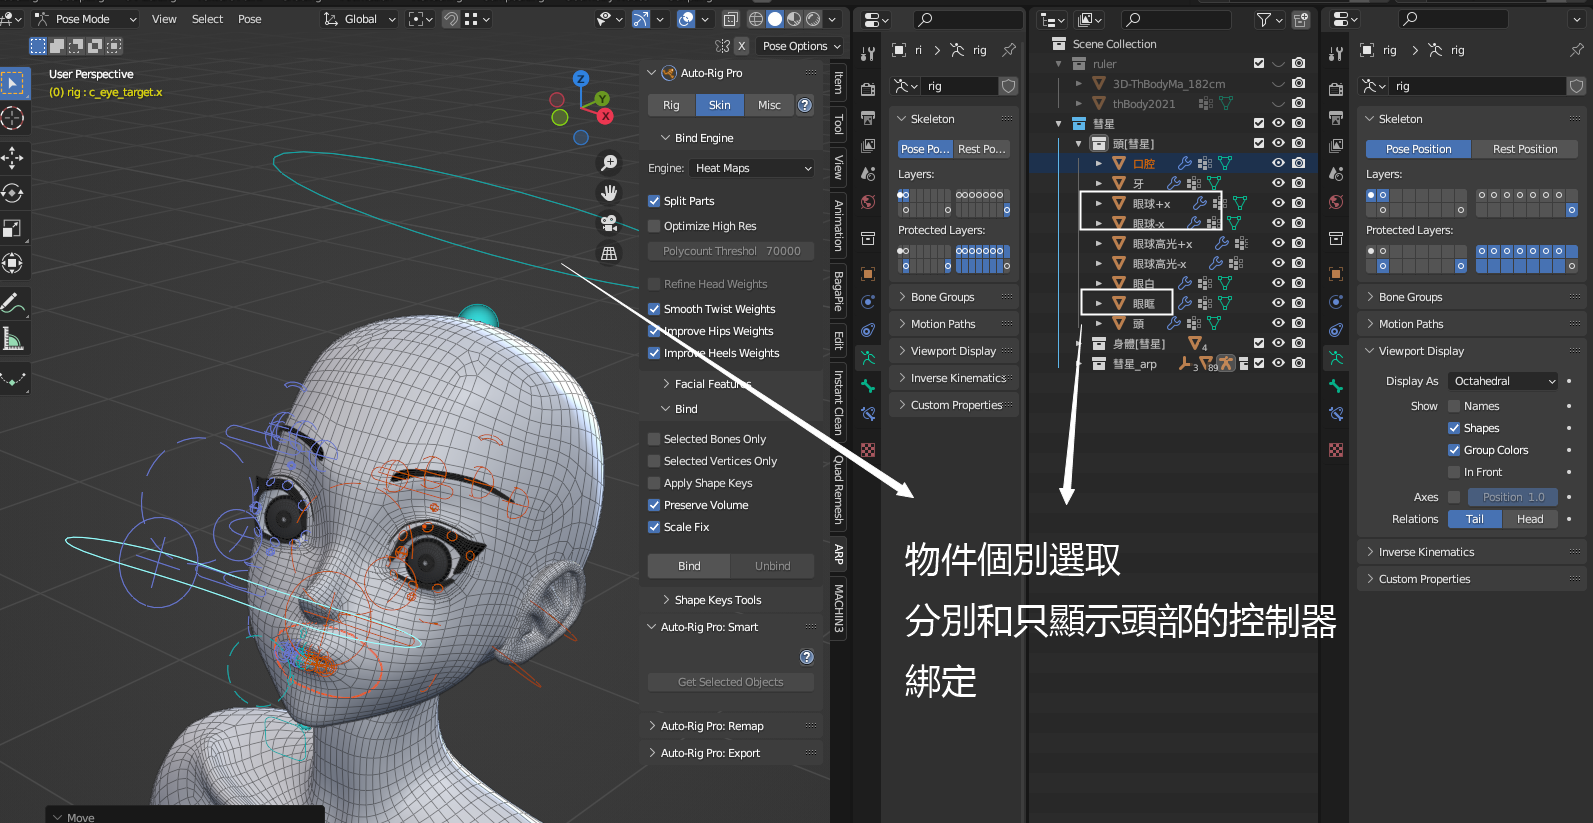
If your mesh is split into many separate objects, you can select them individually → select the armature → Bind.
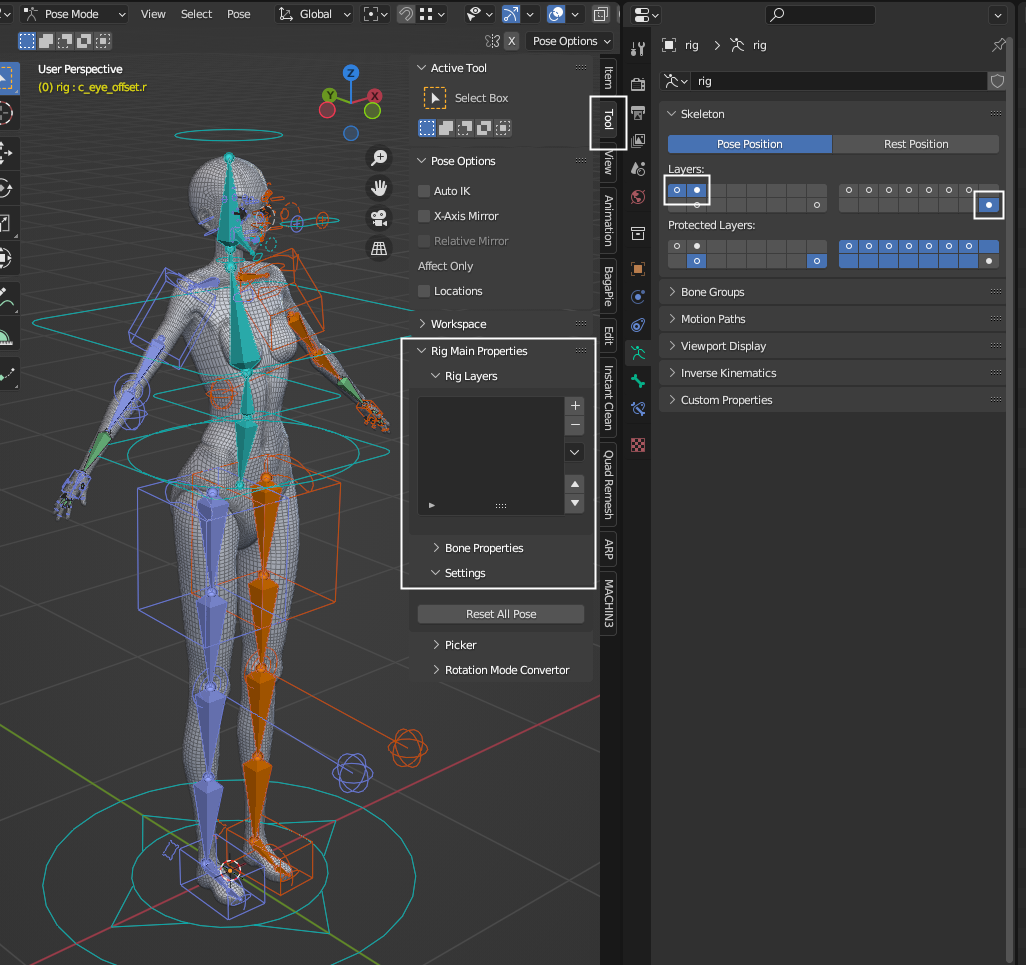
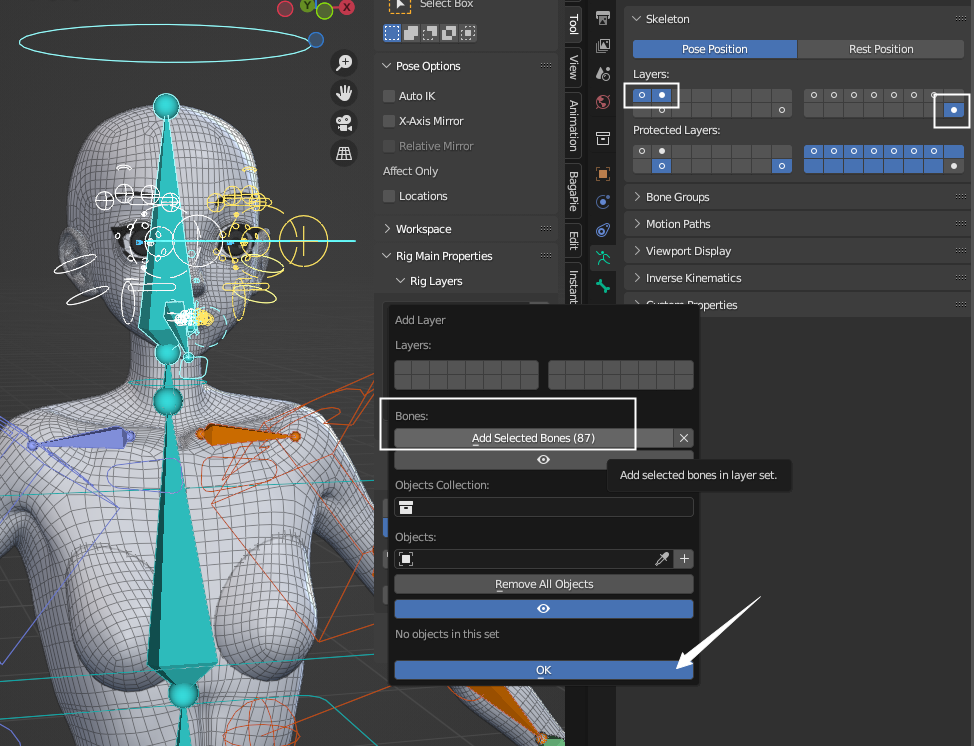
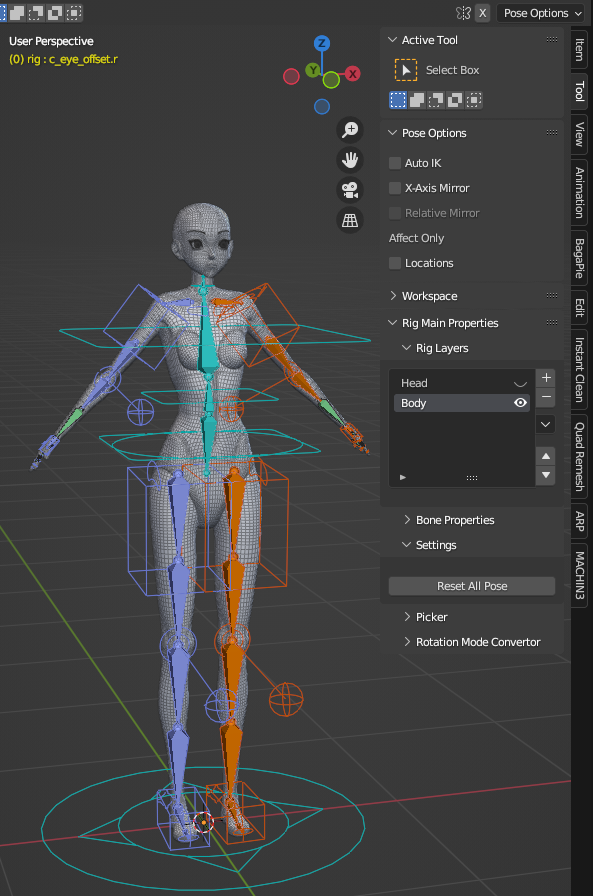
Make good use of the Rig Layers tab in the Tool panel.
Use it to organize and group your controllers.
ARP generates a large number of controllers, which makes it unsuitable for use as a Clip Studio Paint 3D asset.
For CSP body assets, build a simple custom armature and map it to CSP’s built-in rig system.
Also note that CSP character models face the +Y axis.
ARP is primarily designed for creating animations within Blender.
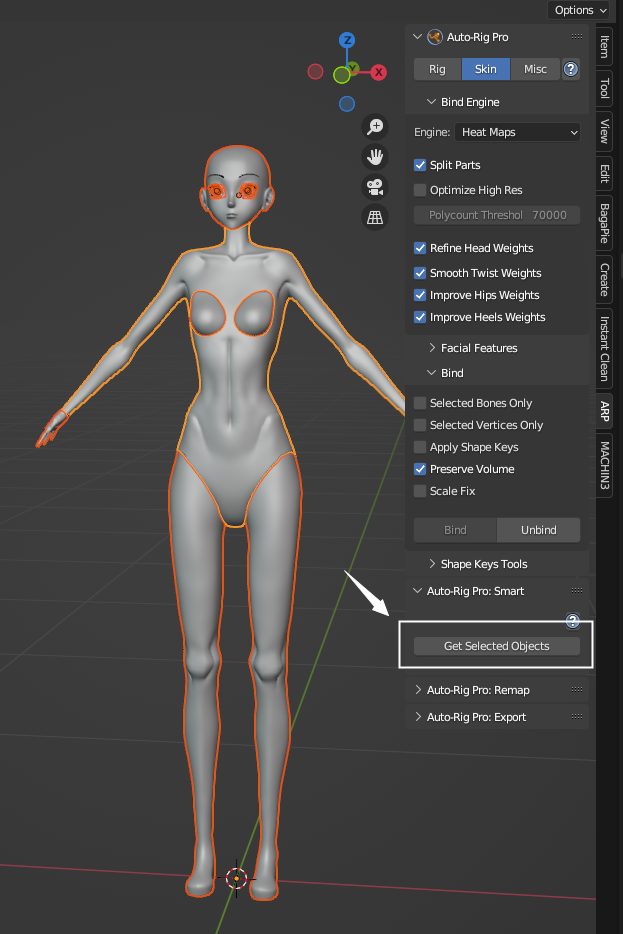
Body Rigging #
Select your mesh, then click Get Selected Objects.
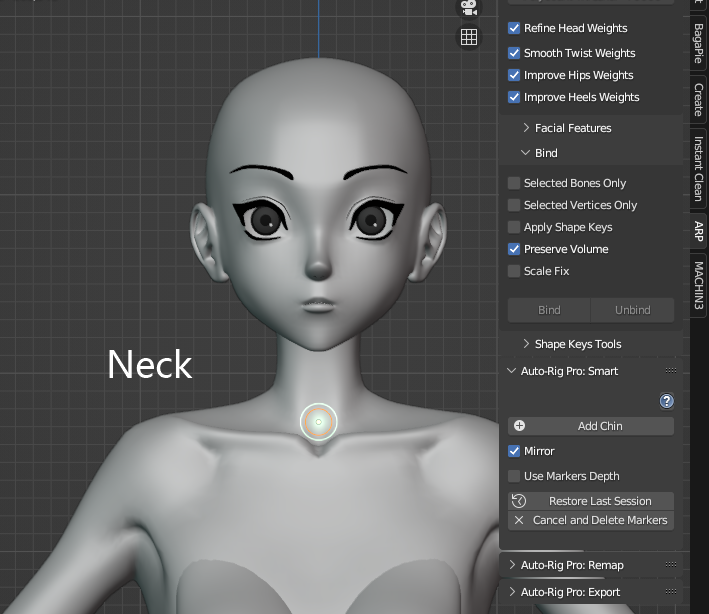
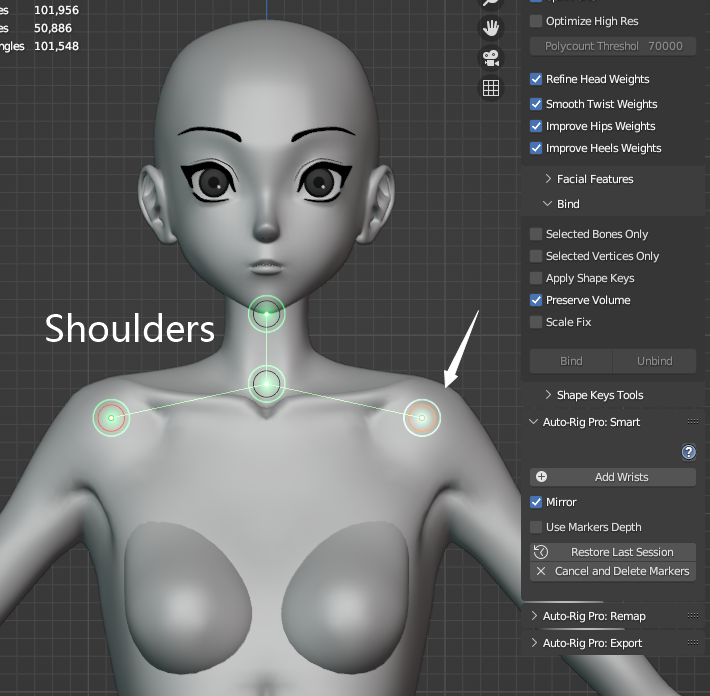
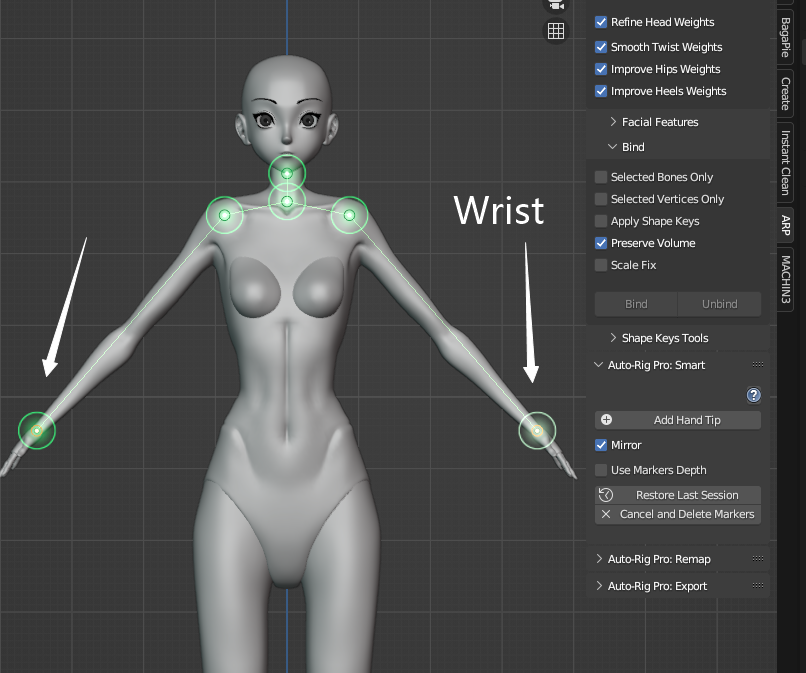
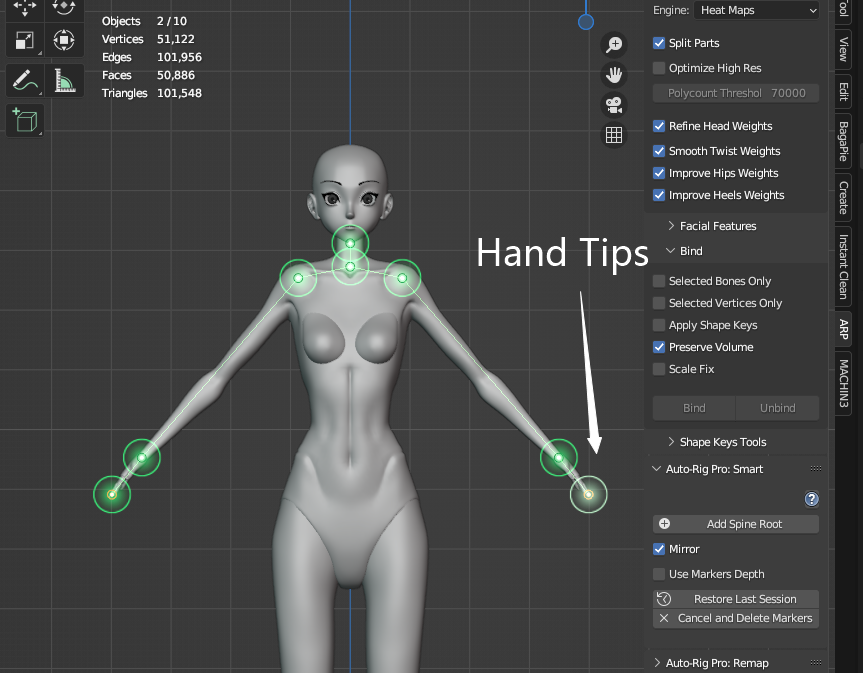
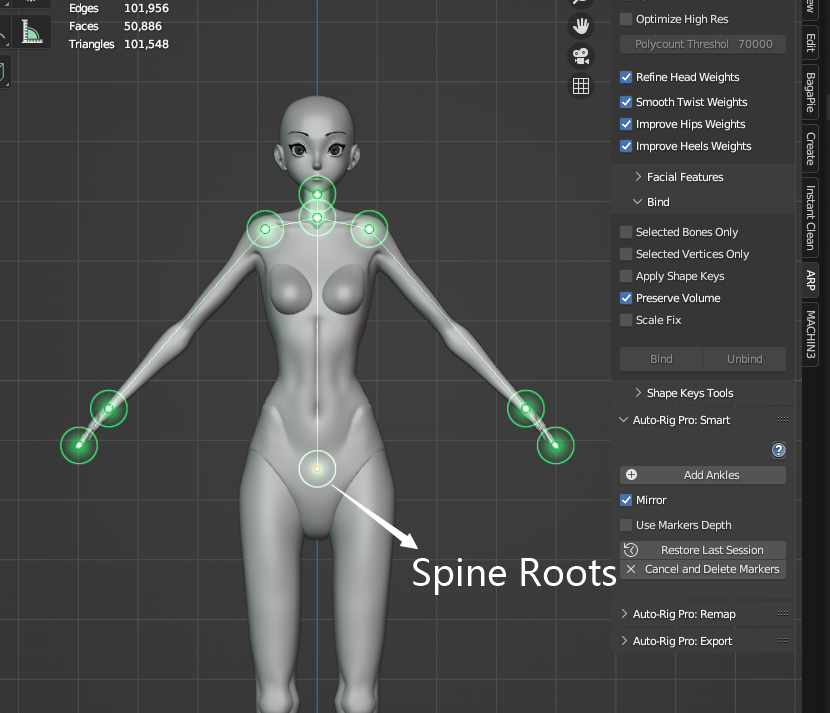
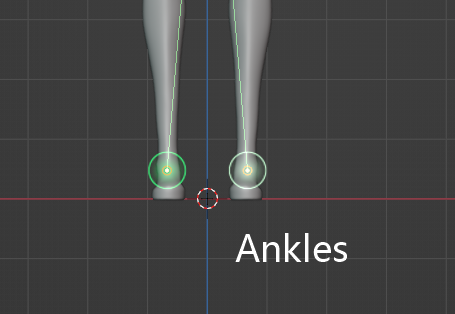
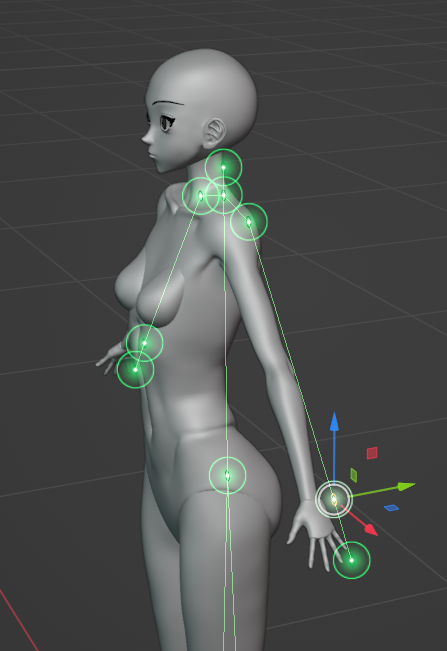
Placing Marker Points
Click to expand screenshots: Placing Marker Points
Start from the Neck.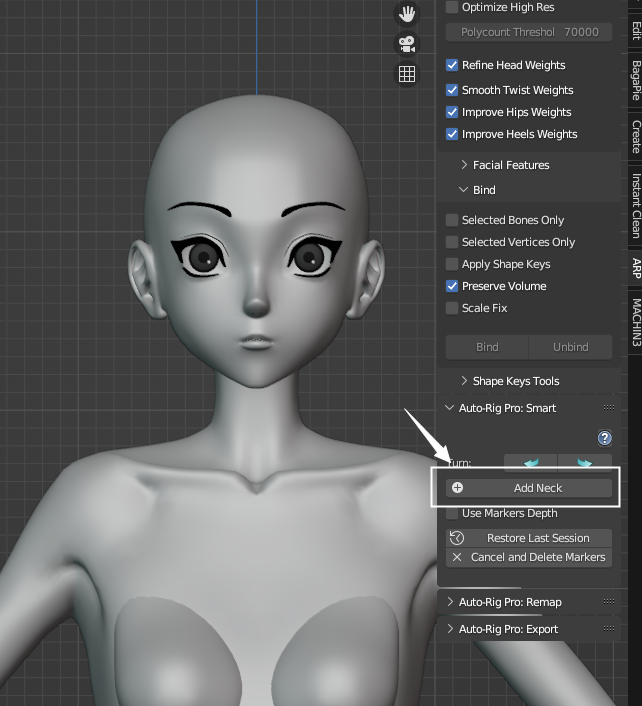

Adjusting Markers → Generating Reference Bones
Click to expand screenshots: Adjusting Markers → Generating Reference Bones
Once the markers are placed, you can fine-tune them in 3D.
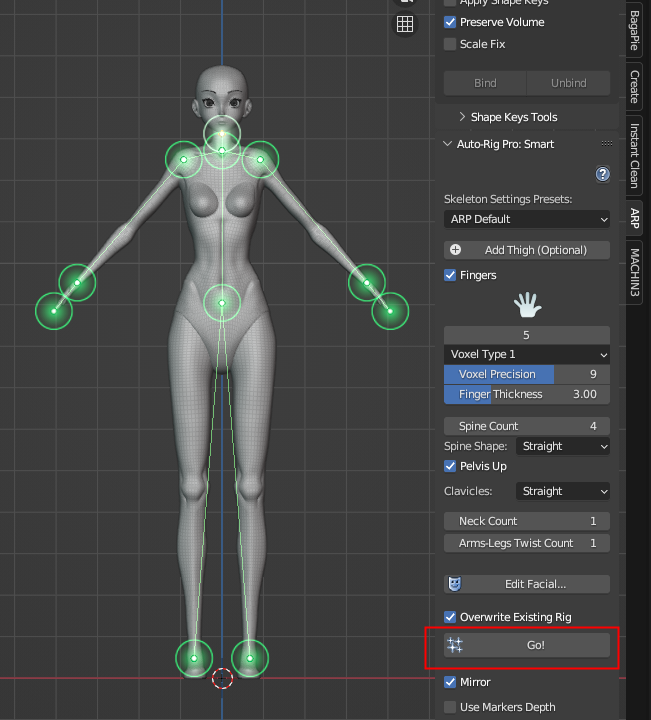
Click Go! to generate the reference bones.
Switching Between Reference Bones ←→ Controllers
Reference Bones → Controllers: Match to Rig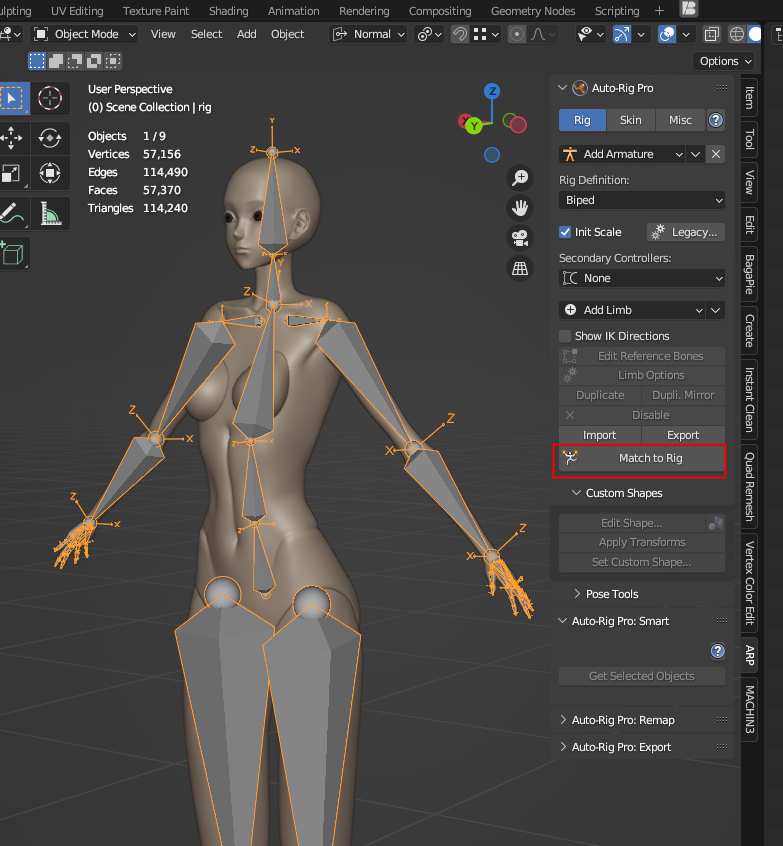
Iterate back and forth between reference bones and controllers to refine your rig.
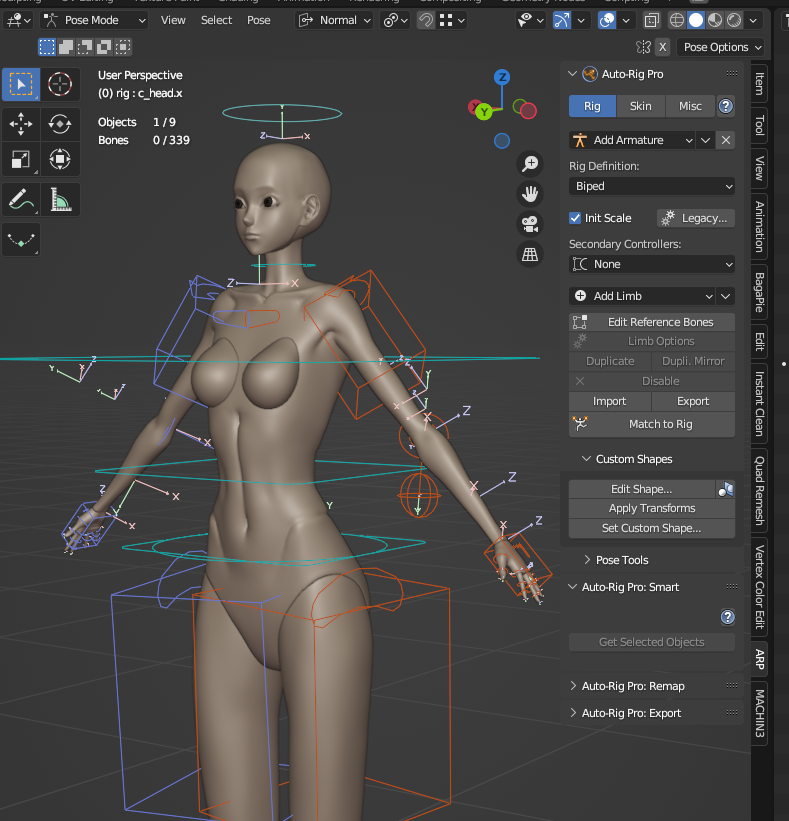
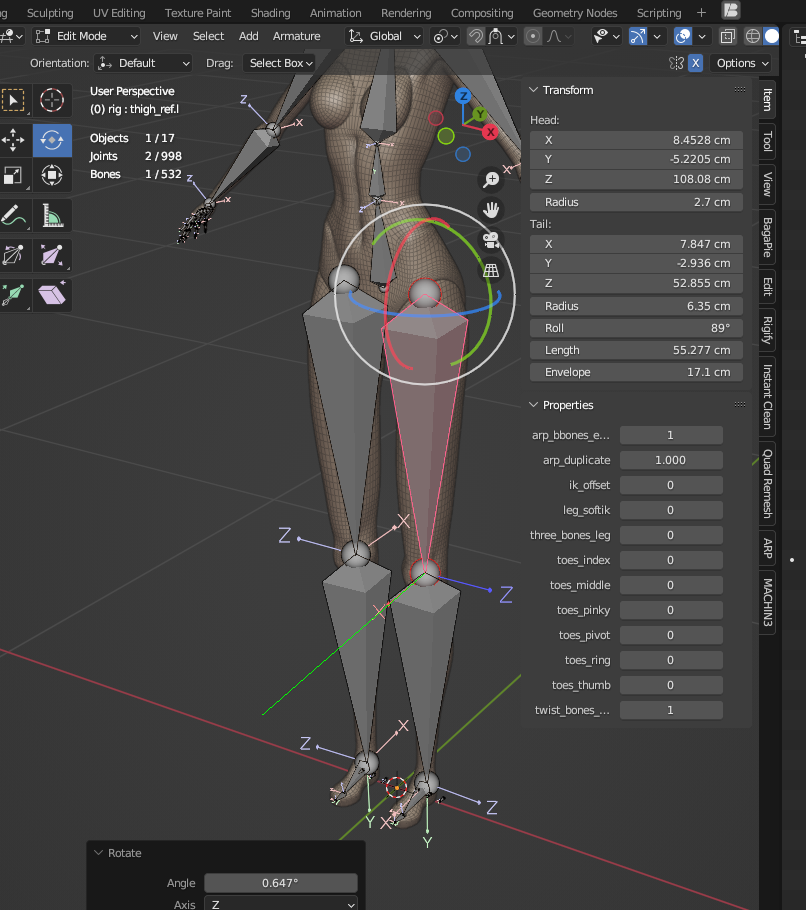
Adjusting IK Controllers
[V] Show IK Directions
When enabled, green lines are displayed so you can verify the IK controller positions.

In Edit Mode, you can rotate bones in Global space to adjust the IK controller direction.
Bind the body.
Facial Rigging #
Official Facial Rigging Docs
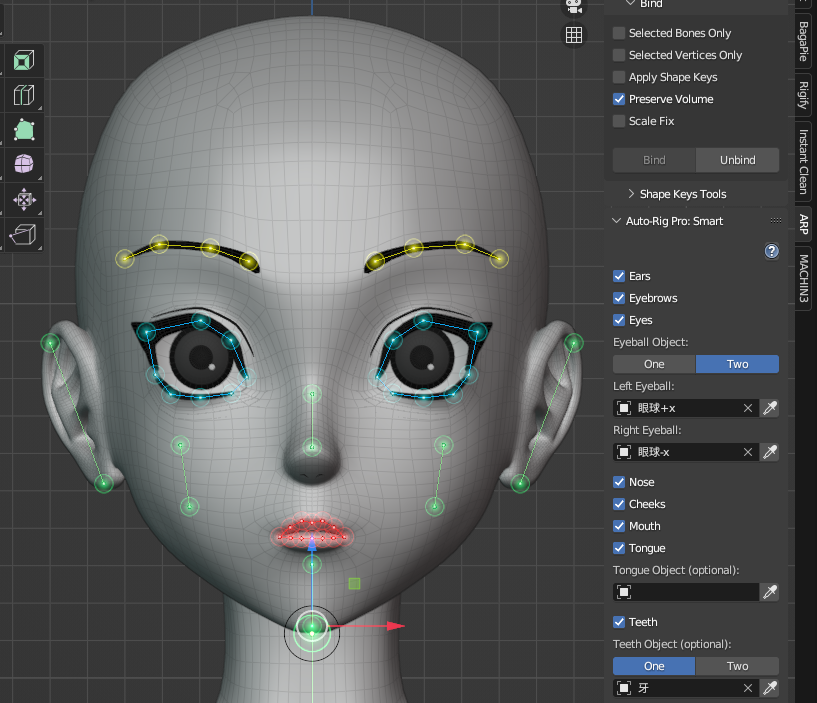
Place the facial markers on the y=0 plane.
ARP uses -Y as the front and will automatically detect the character’s facial features to generate the facial rig.
There’s no need to manually align the markers to the actual 3D geometry of the face. I tried doing that when I was starting out — and it caused errors.
Facial Markers
For teeth, tongue, and other facial elements — if they are checked but ARP fails to detect the corresponding mesh when generating reference bones (e.g., `[v] Tongue` in the screenshot),
Undetected objects will cause an error
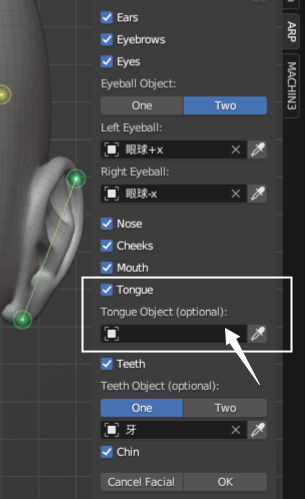
Always double-check your settings and save before proceeding.
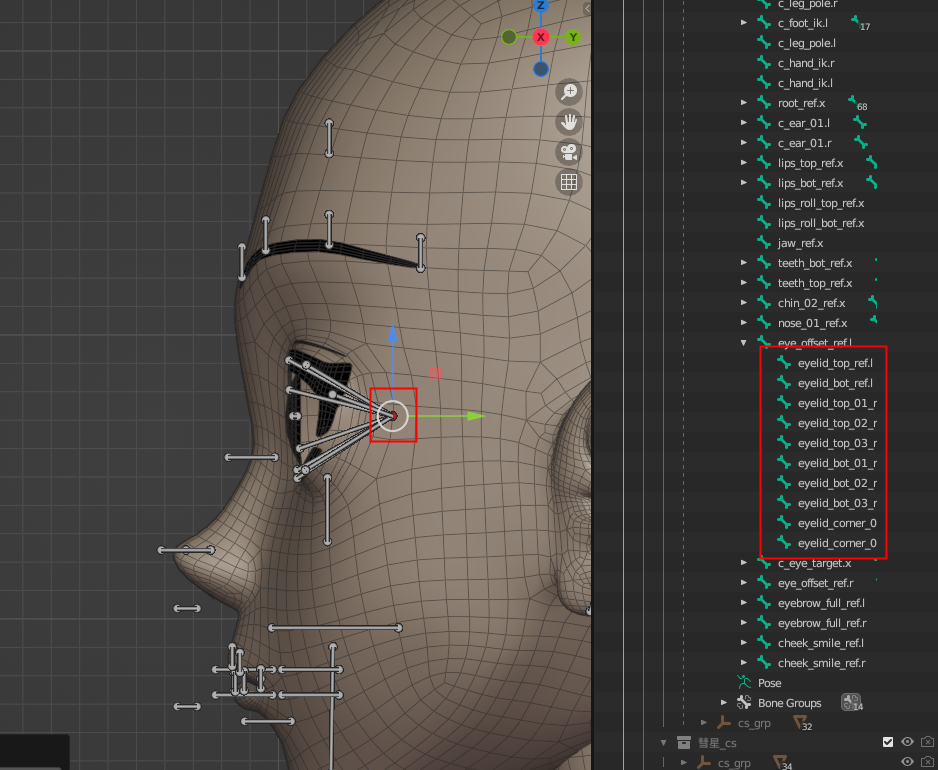
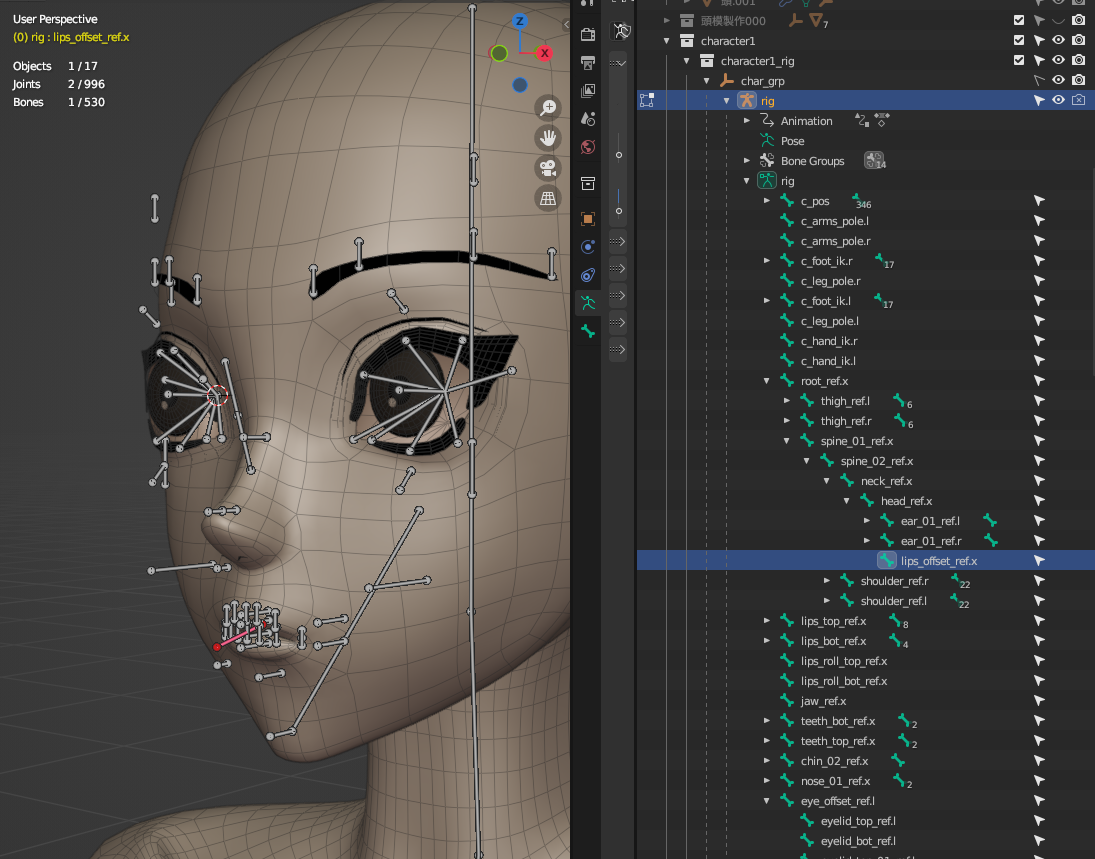
Bone Position Corrections #
ARP may fail to detect the correct position for non-spherical eyeballs.
You’ll need to adjust these manually.
Eye Bone Position Correction
The main eye bone is:
eye_offset_ref.l
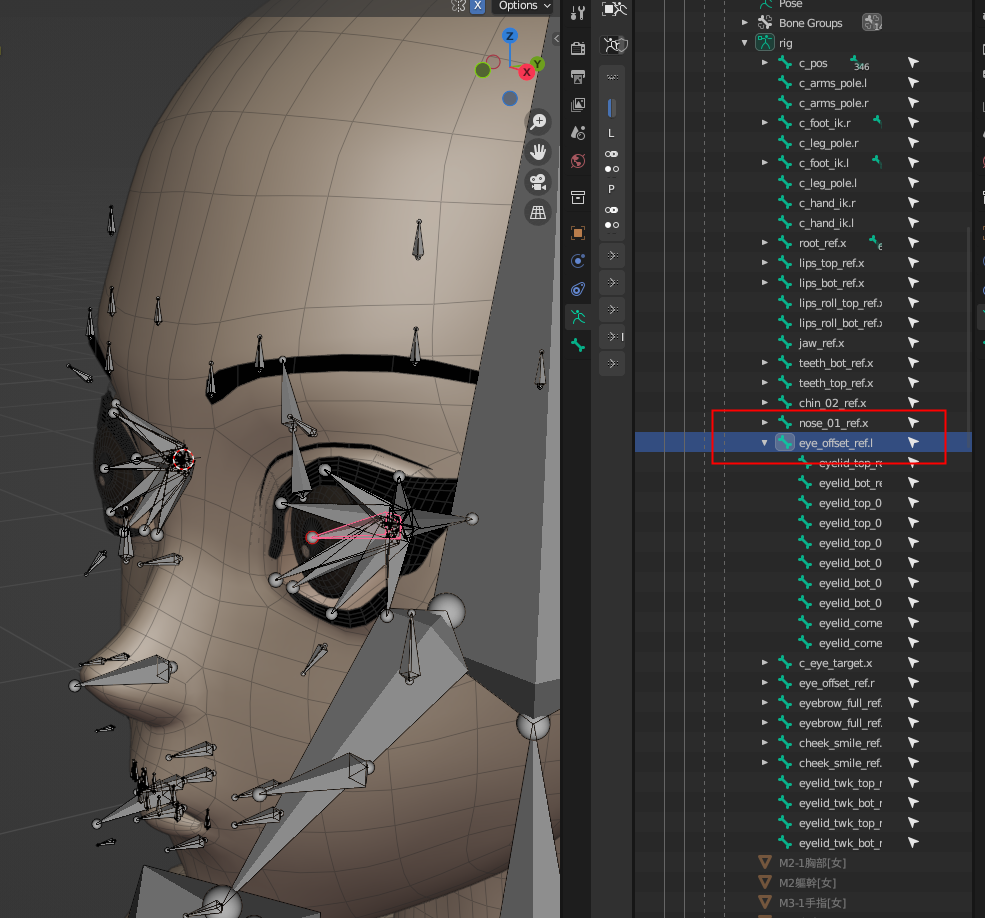
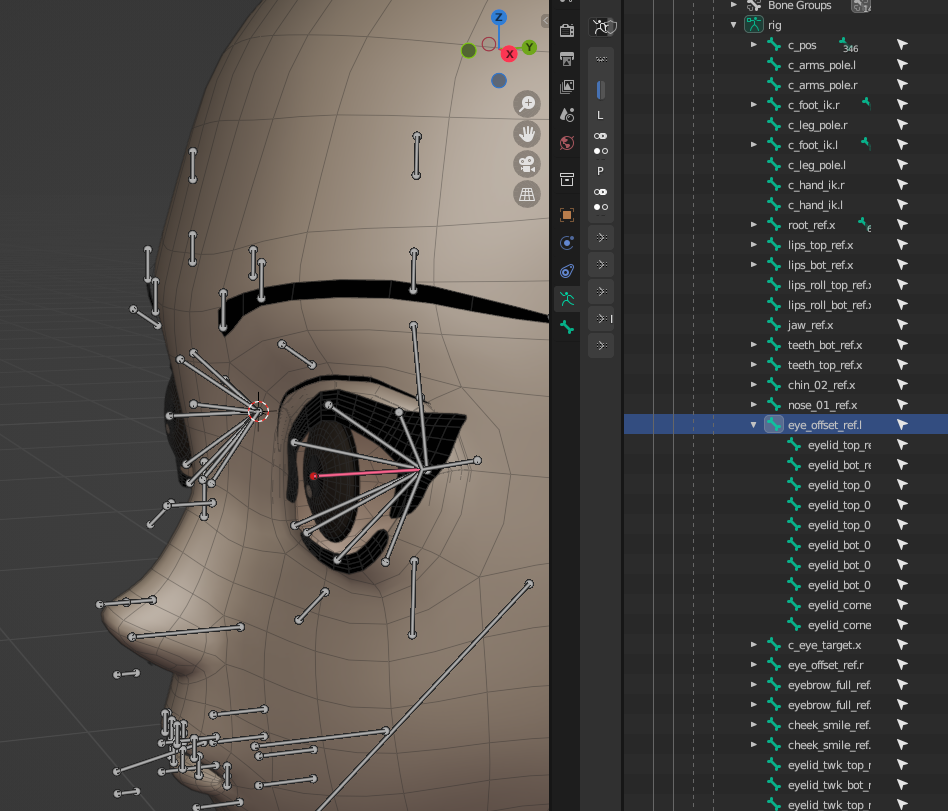
Its children are the eyelid bone series.
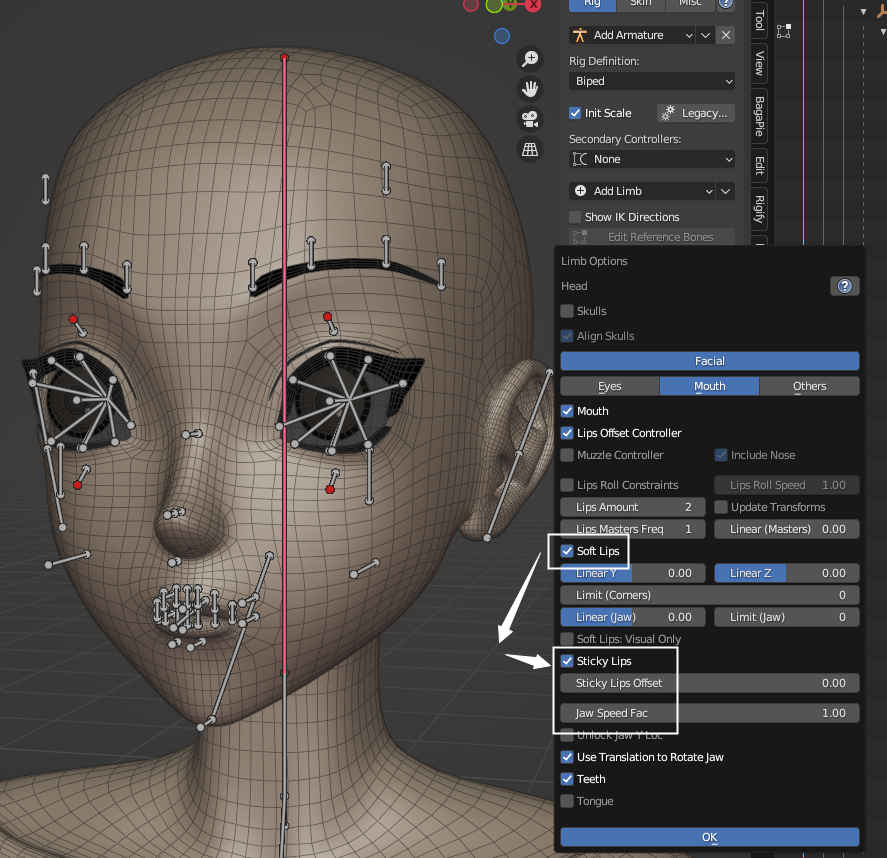
Additional Adjustments #
Select individual bones such as head or spine,
then click Limb Options in the Rig panel to access their settings.
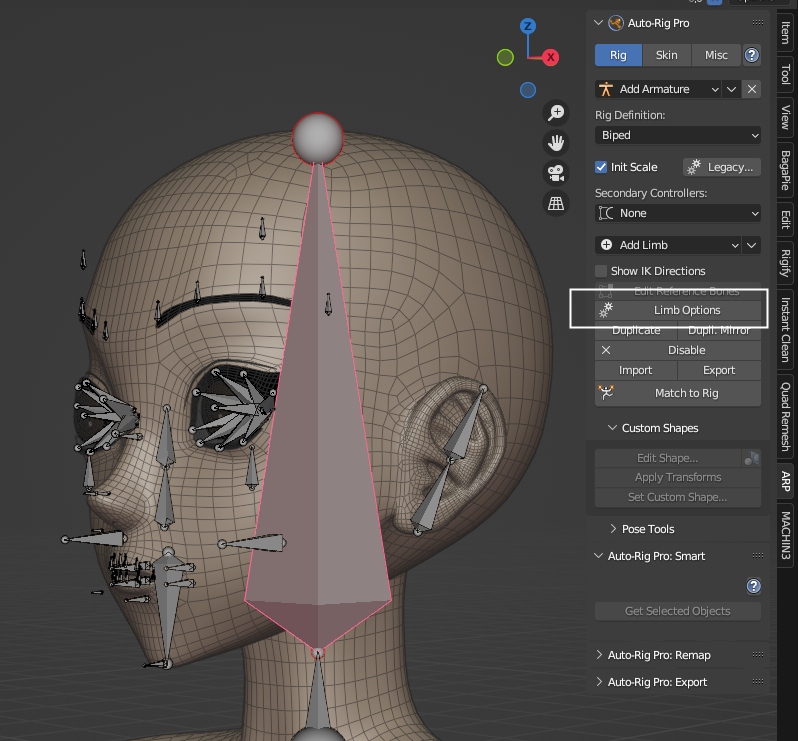
After selecting the head bone, click Limb Options in the Rig panel to access its settings.
Eyelids Tweak Controllers

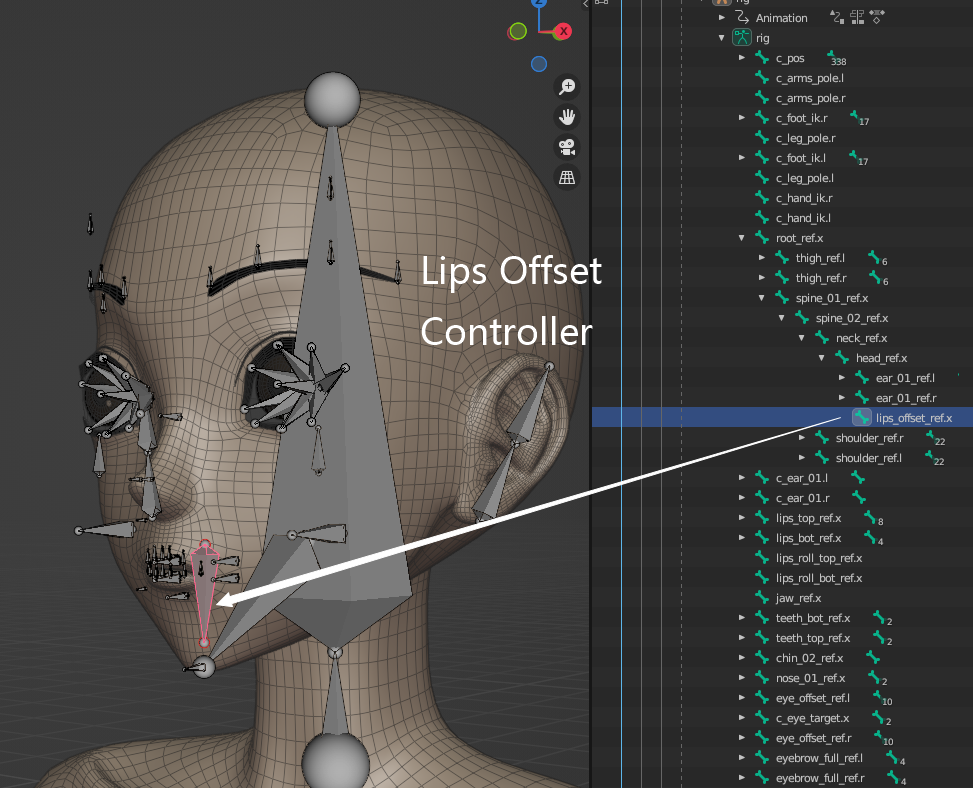
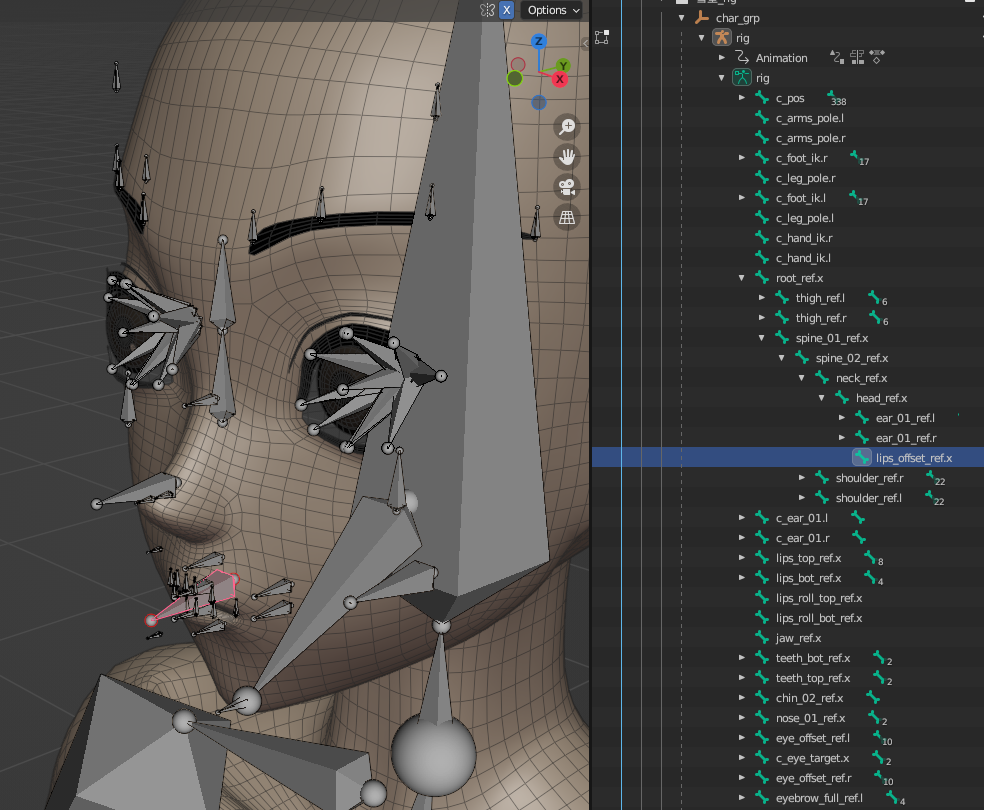
Lips Offset Controller
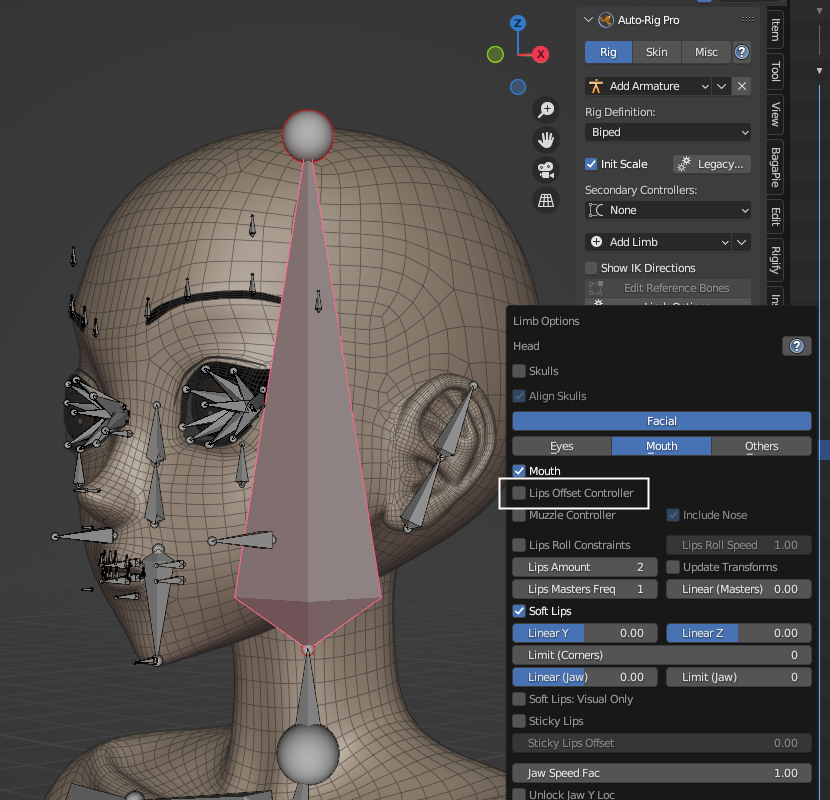
Sticky Lips
Rig Layers #
Rig Layers